
Getting Started With phpMyAdmin
Logging In
- Go to the phpMyAdmin login page at https://jimskon.com/phpmyadmin.
- Enter your username and password. (user your Kenyon username, and your student ID as your password
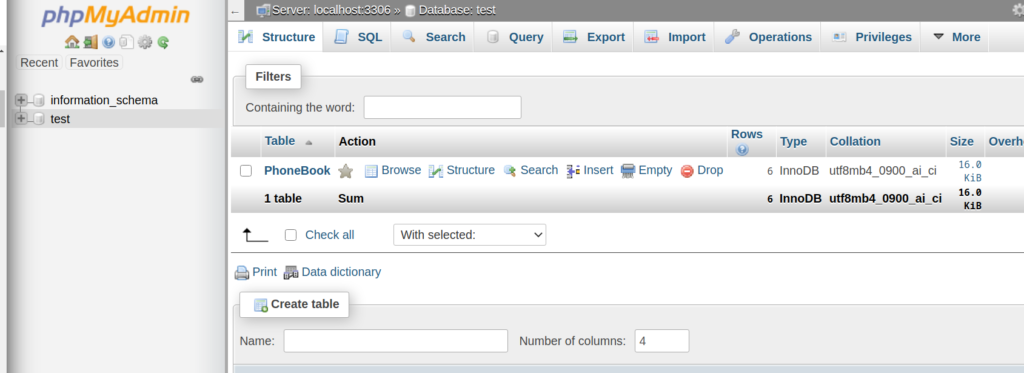
Selecting a Database and Table
- Use the menu on the left to select a database. (Your database name is your username)
Creating and Modifying a Table
Creating a Table
- Find “Create table”, which is located near the bottom of the page.
- Enter the table’s name in the “name” field.
- Enter the number of fields next to “fields”. You can always add or modify fields later.
- Click “Go”
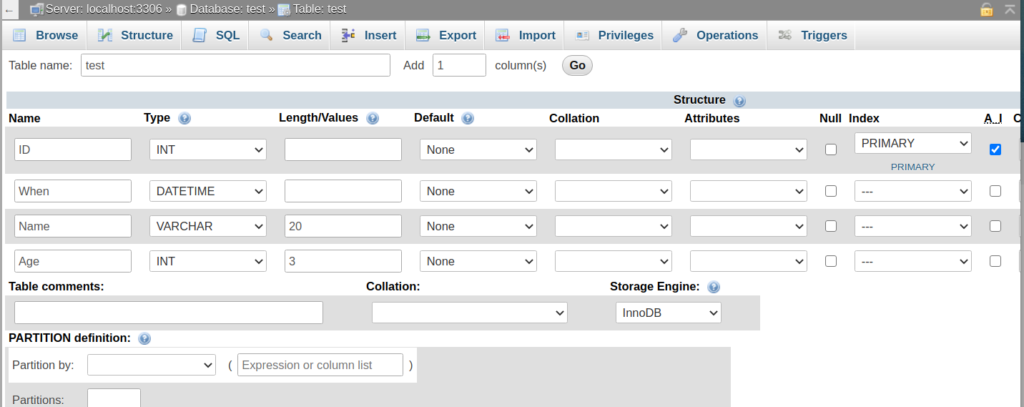
- Each row on this page represents a field.
- The first field should be some type of numeric id.
- The id field is important because it may be the only field that is unique to each table entry.
- Enter the field’s name under “Field”. Name this field “ID”
- Since this is a numeric field, set its Type to INT (integer).
- Since you won’t need negative numbers for the id, set the Attributes option to unsigned.
- Under “Index” select the primary option . (This sets this field to be the primary key)
- We want the id to be filled in automatically. To do this, click the “A_I” checkbox. This stands for auto-increment. (This will not work unless this field is a primary key)
- A datetime field should be used if you want to store the date and time that information was submitted. Add one.
- Name the rest of the fields and select their types.
- Use varchar for short pieces of text like names.
- Use text for longer text like a paragraph.
- Use datetime for storing the year, month, day and time.
- Use date when the date is needed, but not the time.
- Hit “Save” button in lower left when ready to add.
- Go ahead and create a table with at least 6 fields including the ID field.
Modifying a Table
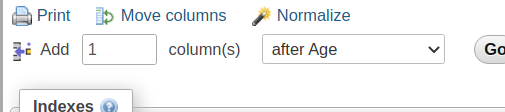
- Click on the “Structure” tab at the top.
- To add a new field, enter the number of fields to add next to “Add a new field”, select a location from field list, and press Go.
- You can modify an existing field by clicking on the change link next to any field name or by checking multiple fields and pressing the change button.
- To delete a field, use the drop link or button instead.
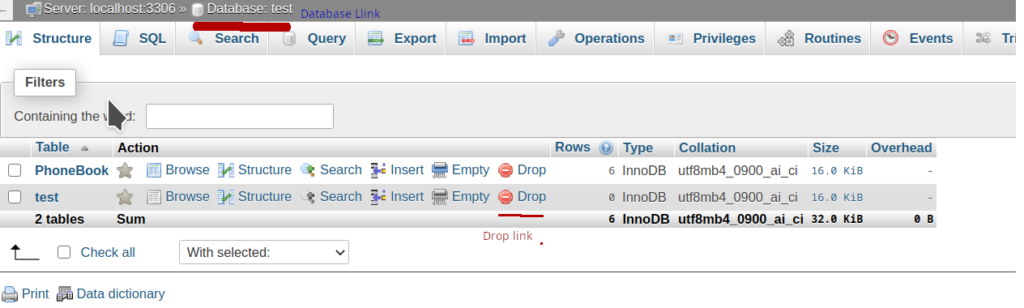
Deleting a Table
- To delete the table click on the name of the database at the very top, then click Drop, next to the table.
- A prompt asks you to confirm your decision.
Tips & Tricks
The NULL value confuses newcomers to SQL, who often think that NULL is the same thing as an empty string. But thats not the case. By typing in Null, you have given a value to the field. However, by not typing anything to the field will return an empty string.
Inserting and Updating Data
Inserting Data
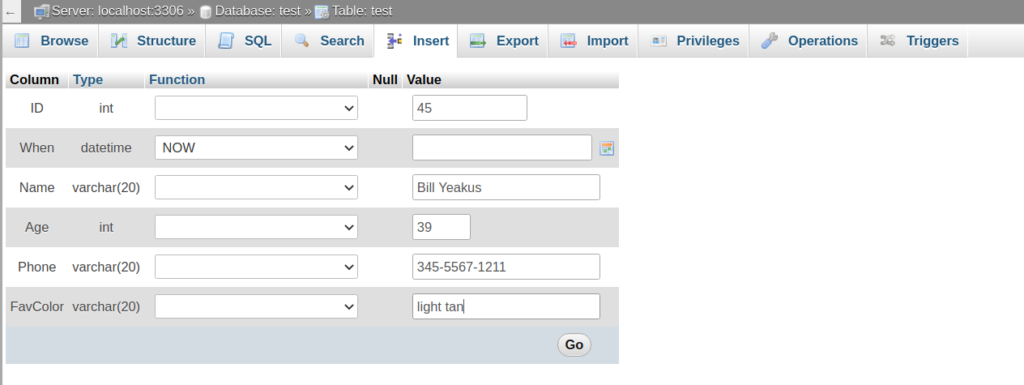
- After selecting a database and table, click on the Insert tab.
- If your ID field is set to auto-increment, you can leave it blank.
- If you have a field of type date time, you can set its value to the current date and time using the NOW function.
- Fill in the rest of the fields.
- Press Go.
- Go ahead and a total add 5 new rows with made up data.
Viewing Data
Browsing
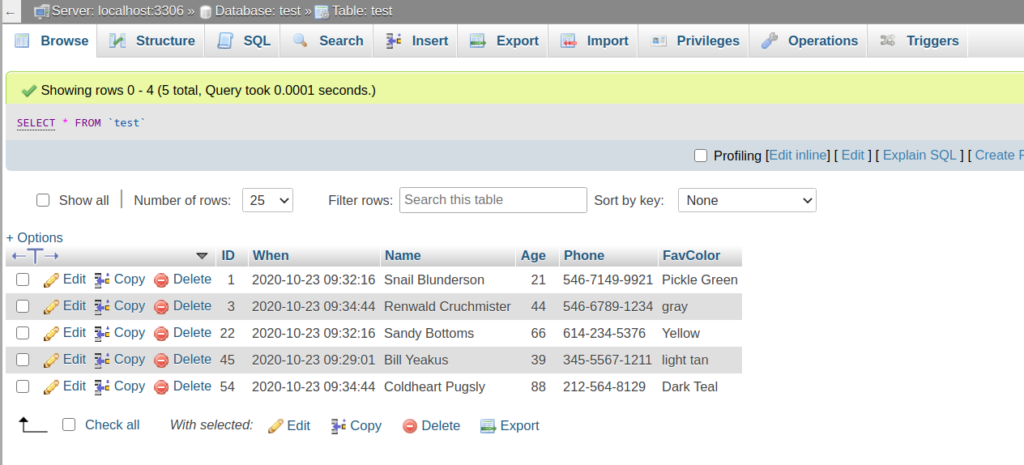
- After selecting a database and table, click on the Browse tab.
- This view shows every row in the selected table but does not nessessarily show all of them in the same page. You can simply click next page at the bottom to get to rows beyond 30.
- Click on a column heading to sort by that column.
Searching with “Select”
- You can use the Select tab to search for rows.
- Enter a value for a field and press Go to select all rows matching that value.
- To do a general search on a text field, surround the word with percent signs.
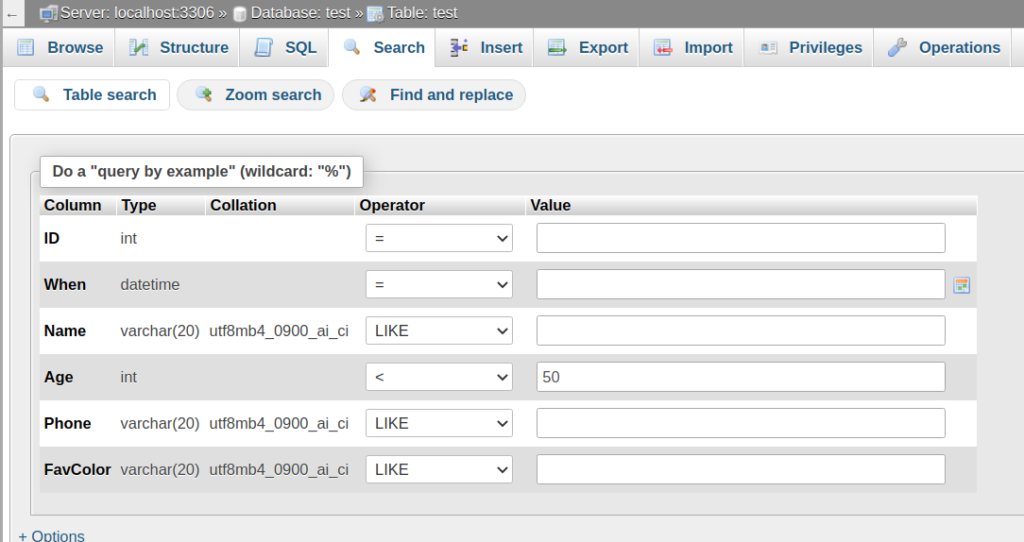
The variable “LIKE” & “=” are very much alike. The slightest difference is that when typing in “=”, it searches for the only variable. Yet, “LIKE” searches anything that may have similarity.
Editing a Single Row
- Find the row that you want to edit using either the Browse or Select tab.
- Click the edit link on the left of the row.
- Update any fields and press Go.
For More Advanced Updating:
Updating Multiple Rows (Using SQL codes)
- You can use the SQL tab to run UPDATE queries or any other query.
- Decide how to describe the data you want to update.
- This is the general form of a query:
- SELECT <fieldnames> FROM <tablename> WHERE <conditions>
- Test your description using a SELECT query, for example:
- SELECT id, firstname FROM people
- selects all rows in table people and displays only the contents of the id and firstname fields
- SELECT * FROM people
- displays every field of every row in table people
- SELECT id FROM people WHERE age > 21
- displays the id of each row whose’s age field is greater than 21
- field age must be of type INT (integer)
- SELECT id FROM people WHERE age >= 40 AND age < 65
- displays the id of each row whose’s age field is greater than or equal to 40 and less than 65
- SELECT id, firstname FROM people
- After pressing Go and viewing your selected data, edit your query by clicking on the edit link.
- Update the selected rows by editing your query:
- Replace the part of the query before the table name with UPDATE
- Before the WHERE clause, add a “SET” clause, for example:
- UPDATE people SET processed = ‘yes’ WHERE age = 18
- UPDATE people SET age = 19 WHERE age = 18
- “affected rows” text tells you how many rows modified.